Random Distribution
The simplest way to distribute points
Random Distribution
The random distribution method is the simplest method available, it will distribute instances randomly on the designated surface(s) until reaching the defined density per square meter area threshold.
Operation Coefficient
Right below the density and seed properties is the "Operation Coefficient" layout, this interface will let you quickly multiply/ divide/ add/ subtract the density by a given factor. You can also hold ALT while clicking to batch apply the coefficient to the selected systems, a very effective way to batch change your distribution densities.
Default Alignment
The default normal/tangent axes of your instances will be your surfaces local Z and Y axes.
Limit Collision Option
The limit collision feature is useful when we want to ensure a minimal distance between the distributed points from a given distance radius.
Warnings
The limit collision feature uses the Poisson disk algorithm which is slower to calculate, especially when dealing with an unnecessary heavy density, do not abuse it.
Misconception
Achieving physically accurate collisions between, let's say, individual branches of trees within a forest, or individual blades of grass within a field, is not a realistic expectation of what is currently possible with current 3D technologies. It also breaks the principle of instancing!
Local vs Global
As the distribution density is defined by a distance unit, we need to calculate our surface square area, therefore our surface scale has to be taken into consideration!
Act of Rescaling
In the local space, the surface scale is not applied therefore the density will stay stable when rescaling the object, in global space, the scale will be applied, and the surface area and density will adapt in real-time.
Seed Values
When you see a seed slider and a dice icon on a feature, it means that the effect can be randomized depending on a chosen seed value. The most significant seed value you can change is the seed of your distribution.
Warnings
Editing the surface's meshes will reset the seed's values.
Pro Tip
A master seed is available in the extra panel, this master seed value will have an influence on every single Geo-Scatter seed present in your .blend file. Rendering an animation of this master seed with a '#frame' driver is the best way to iterate over your environment design quickly.
Mesh Element Distribution
Distribute points per verts/edges/faces
Per Face Distribution
Distribute one instance per face center. By default, the tangent axis of the instances will be stable, even when rotating a face.
Default Alignment
By default, the normal axis of your instances will be aligned toward the face's normal direction, and the default tangent axis will be aligned on the adjacent edge, therefore the alignment will stay stable even when rotating a face in edit mode.
Exclusive Scale Feature
When choosing the face distribution method, a new Scale > Face Size Influence feature will be available, useful to scale the instances according to their emitting face area.
Per Edge Distribution
Distribute one instance per edge center, or, distribute one instance on the first vertex of an edge. Additional selection options are available, useful to only distribute on un-connected edges, or only on boundary edges.
Default Alignment
By default, the normal/tangent axes of your instances will be aligned toward the direction of the edges, depending on your position mode. All default alignments are stable, relative to the edges, even when extruding a vertex in edit mode for example.
Exclusive Scale Feature
When choosing the edge distribution method, a new Scale > Edge Length Influence feature will be available, useful to scale the instances according to their emitting edges length.
Per Vertex Distribution
Simply distribute one instance per mesh-vertex.
Default Alignment
The default normal/tangent axes of your instances will be your surfaces local Z and Y axes.
Volume Distribution
Distribute inside a volume
Volume Distribution
The volume distribution method will generate instances inside the volume of the geometries selected in Tweak > Surface. You are able to choose a 'grid' distribution sub-method, change the distribution density and seed, and change the distribution space to local/global space.
Default Alignment
The default normal/tangent axes of your instances will be your surfaces local Z and Y axes.
Features Compatibility
Some feature(s) are not available for this distribution method:
- Mask>Vertex Group
- Mask>Color-Attribute
- Mask>Image
- Mask>Material
- Abiotic>Slope
- Abiotic>Orientation
- Abiotic>Curvature
- Abiotic>Border
- Visibility>Area-Preview
- Any Feature relying on surface data might be inconsistent
Grid Local vs Global
Here's an example with the 'grid' volume distribution sub-method. With this distribution, the instantiated cubes will be placed in an orderly manner following a 3D grid pattern. As we can see in the video, choosing global space will compute a stable grid on a stable world space, and by selecting a local space, the distribution will stay stable even when changing Suzanne transforms.
Clump Distribution
Distributes children points closer to a parent distribution
Clump Distribution
The clump distribution method will generate two scatters at once. First, it will generate the points for the clumps, then points for children around each clump, depending on the radius values chosen.
Default Alignment
If the Rotation > Align Tangent feature is disabled, the default tangent alignment of your clump children will be the direction toward the parent clump center. This is very useful for plants, as the leaves or branches will need to be aligned as such. The default normal axis of your instances will be the normal axis of your surfaces.
Exclusive Clump Scale Feature
When choosing the clump distribution mode, a new Scale > Clump Scale feature will be available in the Tweak panel. The scale will be driven by your falloff distance.
Exclusive Clump Rotation Feature
A new normal influence slider will appear in the Rotation > Align Normal interface, useful to tilt your children's normal direction toward/outward clumps center.
Exclusive Clump Instancing Feature
It's possible to assign the instances per clump! If the instance picking method is set to cluster, a new toggle will be available, exclusively for the clump distribution mode
Pro Tip
If you do not need the parametric aspect of clump distribution, we'd suggest working with random distribution while using assets modeled in clump already. It will be more friendly to control, for both yourself and your computer.
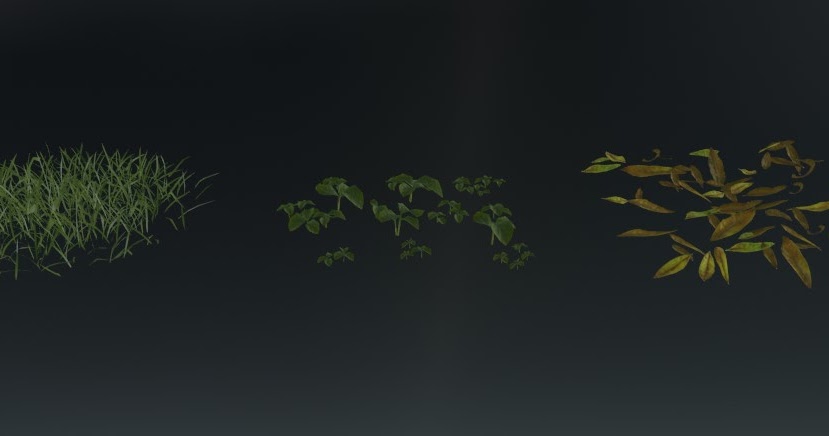
Scattering Clump Models
Sometimes you might encounter models made in "Clump" in your environmental work, these models are extremely useful for filling large areas, as we need way less density to create a meadow with a large clump of grass than with individual tiny grass blades for example.
Comparison Table
While clump models are fundamentally needed for a majority of environments, they are not ideal in some scenarios. It is always important to use the appropriate model for your scene.
Note that assets in the starter library are all in clumps, however, feel free to edit them to narrower clumps if needed. Here's a comparative table
Clump Models Advantages
- Ease of use, lesser density is needed.
- Faster to render
- Less lag
Clump Models Inconveniences
- Not ideal for close-ups.
- Not precise when masking, or near borders.
( except when using this technique ).
Individual Models Advantages
- Clean near borders, more precise area control.
- Better for close-up shots.
Individual Models Inconveniences
- Need way more of them.
- Slower to render.
- Might heavily lag your viewport, or even impossible to use.
Stable Deform Distribution
Distribute your points based on a UV map
Stable Deform Distribution
The stable deform distribution method is a variation of the random distribution method with the main difference being that the generated points are being distributed within an UVW space.
Because UVmaps of meshes stay fixed, you can freely deform/animate your surface(s) mesh in the XYZ space while enjoying a stable distribution seed and density.
Default Alignment
The default normal/tangent axes of your instances will be your surfaces local Z and Y axes.
Pro Tip
Common scatter animation Gotcha's:
- If you're switching an existing system from a random distribution to a stable deform distribution, make sure to select a valid UV map and adjust the distribution density accordingly. The previous density value will no longer be accurate, as 'Stable Deform' distribution density is calculated in UV space.
- Even when using the 'Stable Deform' distribution method, other features might still be responsible for flickering. If you encounter flickers, a good debugging practice is to disable all other features to identify the culprit. Most often, scatter textures need adjustment — ensure their texture space is set to UV.
- Please note that any features that calcuylate a distance between scatters, such as ecosystem features for example, are not compatible with animated terrain deformations, as the distance will vary during the deformation, therefore causing instabilities. Note that you could tweak our Geometry-Node engine to fix this dynamic evaluation behavior with the help of a bake node for example.
Comparison
Above: Random distribution method
Below: Stable deform method
Warnings
Watch out for changes in topology:
- Keep in mind that any change to the actual mesh topology (such as adding or removing faces/edges/vertices) will still cause distribution flickering. While the 'Stable Deform' distribution method handles animated deformations well, it doesn't support real-time topology changes.
- Please note that, as an alternative, the 'Bezier Area' distribution method is more suitable for dynamically changing terrain meshes, since it relies on a projection algorithm rather relying on the mesh’s structure.
Manual Distribution
A whole new distribution workflow by itself.
How to Use
In Tweak > Distribution, change the distribution method to "manual". You will then be able to enter the dedicated manual mode workfspace where you will find a toolshelf on your left with various distribution or tweaking brushes.
Procedural Workflow
Note that all settings of the procedural distribution workflow can also have an influence on the point created in manual mode. You are able to manually place and define instances scale and rotation, then use procedural features to affect your instances.
Default Alignment
The default alignments will vary depending on your brush rotation settings, each point is encoded with its own rotation and alignment information.
Discover the Workflow
Please consult the dedicated manual mode page for more information about this whole new workflow.
¨Physics Distribution
Distribute instances based on a rigid body simulation

Physics Distribution Operator
Implemented since Geo-Scatter version 5.6, Physics Distribution is a distribution mode that allows you to distribute instances manually, (similar to Manual Distribution) but based on a rigid body simulation. Discover the workflow on its dedicated page.
Bezier Area Distribution
Distribute instances on a closed bezier area.
Bezier-Area Distribution
The 'Bezier-Area' distribution algorithm places instances across the imaginary surface of a chosen bezier area.
Project on Surfaces
By default, the distribution will then be projected onto your specified scatter-surface(s) from Tweak > Surfaces however you have the option to leave the distribution attached to your spline, independently from your surfaces.
Pro Tip
You can close a bezier spline if by clicking on the Cyclic U option located in Properties > Curve > Active Spline.
Exclusive Proximity Feature
A new Proximity > Bezier-Area Border feature will be available when choosing this distribution method, ideal if you'd like to offset your distribution relative to the distance from your bezier-area border.
Default Alignment
The default normal/tangent axes of your instances will by default align to the local Z/Y axes of your curve object.
Features Compatibility
Please note that some procedural features or options dependent on the data of your surfaces may not function or be available if the 'Project on Surface(s)' option is disabled.
Performance Benefits
By first distributing locally on your curve, then proceeding to project your distribution on your surfaces will allow you to distribute instances on extremely large terrains with no impact on performances.
Recognize Holes
Since Geo-Scatter version 5.6, we added a new option to better recognize nested bezier curves (closed curves within closed curves) as holes. If the option is toggled off, the distribution will be more stable and the density will be adding on top of each other, which is a nice added benefit.
Bezier Spline Distribution
Distribute instances on a bezier spline.
Bezier-Spline Distribution
The 'Bezier-Spline' distribution algorithm places instances directly upon/around the splines of a chosen bezier curve.
Project on Surfaces
By default, the distribution will then be projected onto your specified scatter-surface(s) from Tweak > Surfaces however you have the option to leave the distribution attached to your spline, independently from your surfaces.
Pro Tip
You can edit your splines in edit mode, change their radius and tilt properties with the tools available in the left-side toolshelf.
Exclusive Radius Feature
A new Scale > Spline Radius Influence feature will be available when choosing this distribution method, useful if you'd like your instances scale to vary according to your curve radius.
Default Alignment
By default, your instances will be aligned to your curve normal and tangent axes.
Features Compatibility
Please note that some procedural features or options dependent on the data of your surfaces may not function or be available if the 'Project on Surface(s)' option is disabled.
Draw Scatter Workflow
Drawing instances along a spline, and then projecting these instances on your surfaces is a versatile and useful trick you should add to your environment artist toolset!
Once set up you can start to draw a curve carelessly across your surfaces from the native blender 'draw freehand spline' tool in curve edit mode.
Biomes Compatible
Best of all, the biome system along as all operators of the Create panel disposes of direct bezier-area or bezier-spline drawing actions. You will save time by enabling the option, especially with the biome system, as you'll be able to project whole biomes from projected curves drawn on the fly. To do so, go in the popover 'On Creation' menu located next to the large scatter buttons, then choose the Paint Mask > Bezier options.
Pro Tip
In the gif example we are drawing a biome with 7 various flower layers all assigned to the same curve. We are using the ALT key to batch tweak the bezier width property to all 7 scatters at once.
Advanced options
This distribution offers you a lot of fine-tuning abilities:
- You are able to choose a distribution subtype, either distribute directly on the spline, or create a pathway area following the spline.
- You can precisely define your spline incline direction: Should your distribution follow the curve tilt, or should it follow another direction depending on your local/global transforms? Or even follow the same incline direction of the nearest terrain?
- Like most distribution methods you are able to define your distribution space, and use the limit collision option.
- If you are using the 'Pathway Area' submethod:
- You can control your pathway area width, transition, and falloff.
- You are able to influence your pathway width depending on your spline radius attribute.
- If you are using the 'On spline' submethod:
- By default the instances will be evenly distributed along your spline, however, you have the option to randomize/spread their locations along or on the side of their spline.
- You are able to create 'rows' duplicates of your instances on the sides of your spline.
Empties Distribution
Distribute instances on empties located in a given collection.
Empties Distribution
The 'Empties' distribution method assigns instances to empties contained within a selected collection. By default, your instances will inherit the orientation and scale of the empties.
This distribution method is quite useful if you'd prefer to use Geo-Scatter to handle your traditional 'manually placed' object instances on your scene.
It will offer you a good flexibility of manually placing objects as you are used to with ALT + D in your scene, while leveraging the useful features and management capabilities of Geo-Scatter.
Project on Surfaces
Like the spline or bezier area distribution methods, this distribution can also be projected onto your specified scatter-surface(s) from Tweak > Surfaces. By default your instances will be tied to your empties transforms, however, it might be a good idea to have them procedurally snapped on your surfaces.
Exclusive Emtpies Features
A new Scale > Empties Scale Influence feature will be available when choosing this distribution method, enabled by default.
Features Compatibility
Please note that some procedural features or options dependent on the data of your surfaces may not function or be available if the 'Project on Surface(s)' option is disabled.