Your Computer Has Limits
Have proper expectations on your computer and your 3D software
We all saw these very impressive unreal engine 5 demos where a gazillion triangles are being streamed into the viewport with absolutely no lag whatsoever! If you are new to 3D, you might assume that this level of performance can be achieved in any 3D app viewport, after all, 3D apps only use clay render, few billions of tris are easy to display. Right?
It is time to adjust your expectations if you assume it is the case! Performances are heavily dependent on your utilization and on the software & hardware you are using. Please remember, a 3D package, is not supposed to be a video-game-like experience.
While UE5 is a fantastic piece of technology, its sole purpose is being able to run in real-time, where stable performance is the key focus of developers, sometimes at the cost of creative "budgets", limitations, and time-consuming or inconvenient workflow.
Blender (& its 3D DCC siblings such as Max/ Maya/ Modo), is not a real-time application, it is a digital content creation tool (alias DCC), where rendering is done separately during a dedicated part of the process (when you click on F12 to execute your final render).
This in return gives us way more creative freedom as the final render can be computed during an indefinite amount of time, compared to being restrained to a stable framerate. But, as a tradeoff, we the artists, will need to be smart on how we preview and manage our heavy scenes when working in the viewport.
You might assume that the best solution to make Blender viewport faster uses game-engine-like optimization tricks, right?
I'm sorry to inform you that this is a common misconception. Distance-based LOD for example, is one of such technology quite demanded by Blender users. Implementing such an inconvenient trick does not make much sense in a non-real-time rendering app. Most likely, you'll experience slowdowns and more memory expenses.
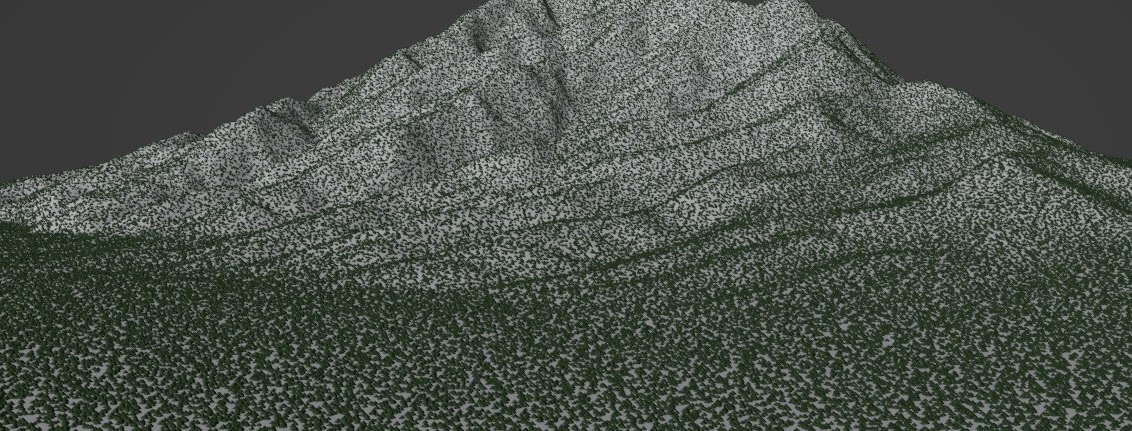
The most optimal, and easy-to-use approach is to simply display a placeholder (a replacement object only meant for visual representation) in your viewport, and render the full-resolution asset only during the final render.
Identifying Slowdowns
Hear these tips to identify the slowdowns like a pro
Rasterization Slowdowns
The viewports (more precisely "solid"/ "wireframe"/ "material"/ "overlay" options) of Blender are running on a rendering algorithm called "Rasterization". It's the same technology used by Eevee or games. This algorithm is extremely fast to compute, however, it does not scale well with high polycount. On the contrary, ray-tracers such as Cycles or Octane do not care about polycount that much. Such ray-tracing algorithms scale depending on the number of rays bouncing in the scene, they can handle renders with multiple billions of tris with ease (see this demo on youtube) however, ray tracers are not a viable solution for working in the viewport yet so we'll need to be careful about what we decide to display.
Let's talk about numbers. For reference, when scattering a 5.000 poly object with my 2080 GPU, my viewport will start to become laggy when displaying 100.000 instances, and become completely frozen around 500.000 instances. (Reminder: to get informed about your scene object-count, enable the statistics overlay in the viewport header -> overlay menu ). However, Cycles ray-traced rendered view will just do fine if we disable the overlay drawing option.
Tip: Slow Overlays
Be aware that enabling the viewport overlay effect has an impact on the performance as it is doing rasterization in the background. Also, note that the viewport shadows or ambient occlusion options make Blender considerably slower!
Tip: Slow Navigation
Another possible slowdown you can experience is when navigating. Blender 'Auto Depth' navigation option can be slow to calculate when working with billions of triangles.
Scatter-Engine Slowdowns
As you may know already, Geo-Scatter is based on a geometry-node engine, it is currently the fastest method available for us, Blender plugin developers. Geometry-node is quite fast by nature! If you avoid hitting viewport rasterization slowdowns, by for example using the display as a point feature, the next logical slowdown you will be facing is the calculation done by the Scatter-Engine itself. Depending on your update dependencies and the feature you are using, around +-5.000.000 points are manageable when working live in the viewport.
What are update dependencies? Well, it is when an element in your scene or in the UI will trigger a recalculation, when for example, changing slider's values will trigger a recalculation of the scatter, and so does moving elements tied to a scatter-system such as an emitter, a chosen surface, camera, or an object inside a proximity feature collection for example.
Tip: Use Separate Emitter
Note that using a dedicated empty emitter will make things faster to compute on big scenes for Blender when tweaking slider's. When you change a property of a surface used for scattering for example, even if this property does nothing, blender will register an update signal.
Memory Limit?
If you want to scare a 3d artist, the best way to proceed is to display a message in his interface telling him he ran out of memory! However, this is unlikely to happen in a scattering workflow, because scattering is using a memory-efficient object duplication technique that I am sure you are familiar with, called "Instancing". Internally, the mesh & texture information of your object will be re-used in memory. So no worries with memory usage when working with Geo-Scatter.
Highpoly Slowdowns
Scatter is quite forgiving regarding your chosen surface polycount, but not Blender! Vertex color painting, weight painting, and texture painting will be slow when approaching 200.000 verts.
Fortunately, there's a way to avoid this, by using two distinct terrain objects instead of one: one invisible low-poly version you will use for scattering & painting, and another high-res version only used for the final render.
Be warned that it is not a good idea to use a subsurf modifier on your emitting surface as it may reset the seed of your scatter-system(s) and slow down your scene.
Instance Limit?
The brand new CyclesX also has limits, you'll be able to render up to 30 million instances before the initialization time, canceling time, and RAM consumption becomes too heavy. I believe this limit will be improved upon a later release, after all, CyclesX is still brand new (writing this in 2021).
Other rendering engines, such as Octane, might have a different limit. Note that the Scatter plugin and geometry node are compatible with external render engines of course.
Hide From Viewport
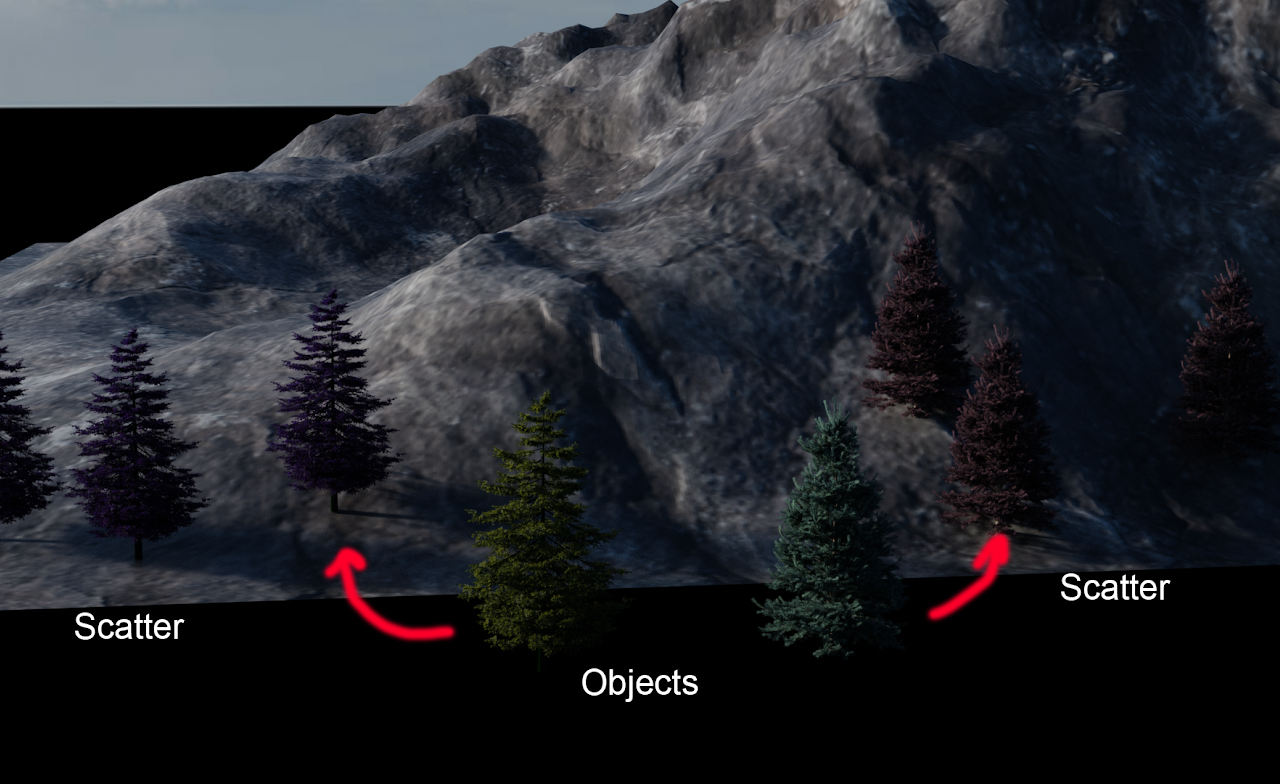
What you see, is not what you get
Ray-Tracing is Powerful
While the viewport rasterization algorithm might not be able to display your render, it does not mean your ray-tracer will not be able to handle the load! Hide problematic layers for the viewport, and render them later in your final render, this is the most important optimization trick you should think of when working with 3D DCC's such as Blender
Hide What You do not Use
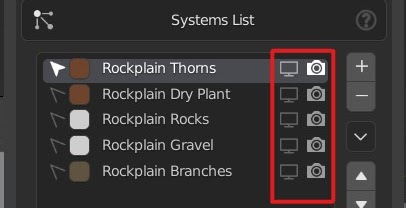
When working on large sceneries with a lot of scatter-systems, it is a good practice to hide what you do not need to visualize in real-time by turning off the viewport display (screen icon). The system will always appear on the final render if the render toggle is enabled.
Reminder
There's a handy shortcut to quickly isolate a scatter-layer: holding ALT when clicking in the system list.
Consider Security Warnings
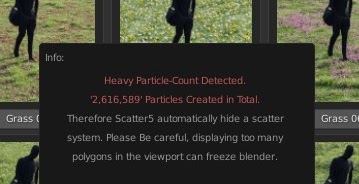
If you ever received a message warning you that you have created millions of instances and that Geo-Scatter automatically hid the scatter-system for your own safety, perhaps it's best to be careful! Accidentally un-hiding such a system could freeze your computer! The best would be to enable the max amount feature just in case.
Reminder
The security measures can be disabled in the operators popover menu of the Create panel. Refer to this article for more information about the operators 'On Creation' popover panel.
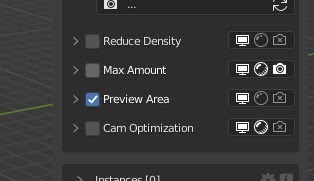
Preview Area
Optimize your workflow by working on a preview area
Preview Area
When working on large environments, it will be hard to visualize all the scatter layers simultaneously on the full surface of the terrain.
We can use the preview area feature to sample some selected faces. The final render will not be affected, except if you want it to (see visibility features below).
Maximal Amount
Avoid overloading your viewport with too many generated points!
Maximal Amount
If you'd like to have an extra layer of security while working on larger scenes, enable this
feature. It will guarantee that your instance count will never exceed the instance count threshold.
Please note that this feature only act after the points were generated, if you distribute 500 million items,
it will still create a slowdown, even if these items were removed and not visible in your scene.
In the example hereby, once our scatter reached 10.000 instances, it was automatically hidden on your viewport. You can choose to either totally shutdown, or to limit the number of total items visible.
Density Reduction
Optimize your workload by reducing the density of the generated points
Reduce Visibility
In the visibility category, a removal rate slider is available to reduce what's visible within the viewport. The final render will not be affected, except if you want it to (see visibility features below).
Camera Optimization
Optimize your workflow with advanced camera optimization settings
Frustum Culling
The frustum culling feature will remove instances not contained within the given FOV range. The FOV will be calculated automatically if the "per camera setting" toggle is activated.
Distance Culling
This optimization feature will create a culling transition from the given distance range with your active camera.
Occlusion Culling
The occlusion culling option lets you hide points located in areas unseen by the camera. Optionally choose a collection of occluding objects.
Camera Update Dependencies
One of the inconveniences of the camera clipping/culling feature is the recalculation of the scattered point for each camera move. This recalculation might become sluggish in some scenes. If you start hitting such a slowdown, you can change the camera update behavior.
In the example hereby, the update method is set on 'Halt' mode, the update will only trigger when the camera has stopped moving. If you wish the camera updates to be calculated in real time, choose the 'Realtime' option & we'll use blender 'Active Camera' node instead of relying on our plugin to send the camera transforms information.
Efficient Distribution Option
If this option is not enabled, the instances will first be distributed on the integrality of your terrain, and then only be culled if not
in the camera culling frustum cone/distance threshold.
If the option is enabled (it should by default), the Scatter-engine will first compute a preliminary culling based on which faces of your surfaces
are contained within the camera culling frustum cone/distance threshold, then a secondary more precise culling will occur.
If you are working with extremely large terrains containing a decent amount of even topology to work with, this feature will save you a lot in terms of performance.
Alt-for-Batch Reminder
These features are to be activated per scatter-system, this grants you the
ability to precisely choose the level of optimization depending on your system. Remember, If you'd
like to batch-apply settings on all the selected scatter-systems, the
ALT-for-batch
behavior is here for you, it's the official method to batch apply settings to many items simultaneously in Blender.
Optionally in your upper right corner, you can access a menu
by clicking on the gearwheel icon, where you'll be able to apply your settings to the desired scatters.
Display As
Disguised your instances
Display As Feature
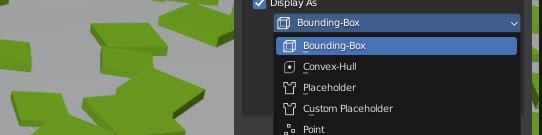
The "Display As" feature will let you represent your high poly instance with a more efficient drawing solution, there are multiple methods available at your disposal, and some are more efficient than others:
- Bounding Box: This will display the solid bounding box of your instances.
- Convex Hull: This will display the convex-hull geometry of your instances. Be aware that this option is heavier to calculate!
- Placeholder: Replace your instances with one object available in a predefined list. Note that some placeholders in this list are handy for visualizing rotation and alignment settings.
- Custom Placeholder: Replace your instances with the given object.
- Single Point: Replace your instances with a single point at their origin. Points are extremely fast to rasterize, Blender can display millions of them with no slowdown in the viewport.
- Point-Cloud: Replace your instances with a generated group of points, ideal for having a good representation of the final render-shape.
- Voxelize: Replace your instances with a generated simplified voxel mesh, providing a good balance between performance and visual representation.
- Deletion: Replace your instances with a mesh that has a ratio of deleted faces, creating a simplified version while maintaining the overall shape.
Display Scale
The display object size can be adjusted with the vector scale values, allowing you to fine-tune the visual representation of your instances in the viewport. Additionally, a toggle is available to automatically adapt the size of the display shape depending on the underlying instance dimensions, ensuring that the display objects maintain proportional scaling relative to your actual scattered instances.
Reveal Near Camera
The reveal near camera option will reveal the real geometry of the instance when the camera is close by. Using this feature in combination with point display and camera clipping/culling is one of the best real-time viewport optimization tricks you can get in Geo-Scatter!
Moving the camera will trigger a recalculation of the scattering, as explained above, update dependencies linked to camera's can be tweaked.
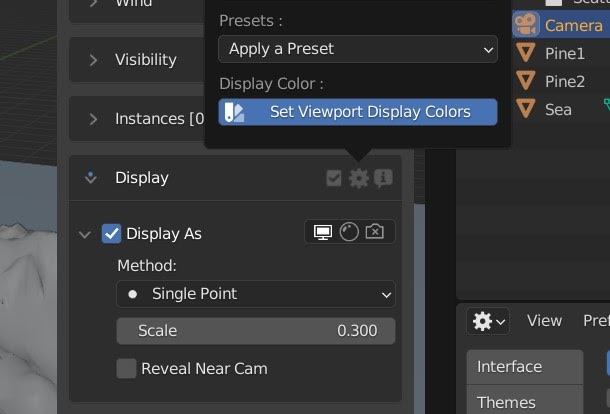
Object Display Color Representation
Here's a tip! In the header popover menu of the display feature, click on "show systems colors" to have an accurate representation of your scatter-system assigned color within the viewport! This operator will simply put the shading on "solid", and set the shading color on "object".
Inaccurate Render Color?
If your rendered object color is not the same once scattered, that's probably because your object (that you probably bought online?) uses the 'display color' property as a color influence in its materials shader, meaning that the display color is not used only for viewport display purpose but will also have an impact in the render. If you have this problem, simply change the display color in Geo-Scatter system-list.
Display As & Biomes
This feature can be encoded within a biome file. Thanks to this implementation, you can activate the display feature when scattering a biome, this option is located in the biome manager Header>Option menu.
Level of Detail
Replace your high resolution objects with LODs based on distance from the camera
Expectations on Performance Gain
Please note that a LOD functionality only really helps if your main rendering pipeline is a rasterizer renderer (such as Eevee or Blender Viewport). Rasterizers scales their perfs based on the number of polygons displayed on screen (That's because their rendering algorithm is based on batch rendering prixels by triangles). If you intend to use a LOD system to help you with ray tracer renderers (such as Cycles or Octane), you'll most likely not see a lot of performance improvements, or worse it might be counter productive! Ray-tracers shouldn't have problems with high polycount objects, they can, on paper, handle billions of triangles in real time.
Level of Detail System
Since Geo-Scatter 5.6, A Camera-based LOD system is available in Tweak > Display for up to 5 levels of detail per instance object.
How to Use
First, scatter your highest level of detail objects (LOD0) using the normal scattering workflow. Only the highest quality models should be listed in Tweak > Instancing instancing list.
Then, navigate to Tweak > Display > Level of Detail where you can define the maximum LOD level and assign LOD models for each instance. You can set distance thresholds from the camera (min/max values) and customize the transition behavior with a curve graph.
Auto Setup
If your LOD models follow a naming convention like "ModelName_LOD1", "ModelName_LOD2", etc., you can use the auto setup operator to automatically assign LOD levels based on the naming pattern.
Visibility States
Define the behavior of the optimization settings you activated
Visibility States
All optimization features presented above are active/inactive depending on your render state. It's possible to define when the effect takes place during the rendering process. Please enable the solid/rendered/render icon to change the visibility states.
Known Issue
Having multiple 3D viewports in your scene is problematic for the rendered view feature, it is impossible for plugins or geometry-nodes to enable a feature only for certain viewport space unfortunately.
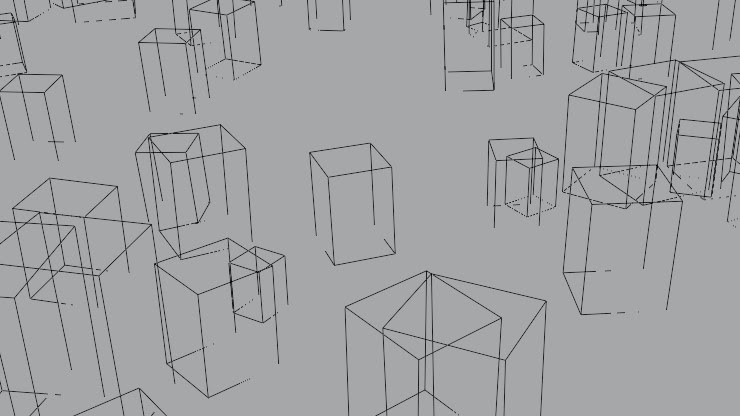
Wireboxes Everywhere?
Beginners often don't know this native Blender functionality
What are Bounds?
The bounding box display is a native blender per-object option located in Object Properties > Viewport Display > Display As. Sometimes the object you are scattering may have the bounding-box display enabled, either because the scattered object has this setting active by default, or because a Geo-Scatter security option is protecting you from scattering high-poly assets (to avoid freezing blender).
Pro Tips
- In the instance list, you can easily reveal the objects you are scattering in your scene by clicking on their select icon.
- You can batch disable/enable all the blender bounds display options simultaneously with the operator located under the Gearwheel icon in the feature category header.
Slider Reactivity
Geo-Scatter gives you unique properties update controls
Properties Update Behavior
Tweaking sliders in Blender can be slow sometimes, in that case, it is advised to manually input a number and press enter instead of doing mouse-sliding gestures that could potentially freeze your Blender session.
Geo-Scatter properties have been implemented with its own ALT-for-batch system, and also, their own update delay behaviors! In the extra panel, it is possible to tweak your Geo-Scatter settings update behavior, By default the Blender will try to send update signals when you slide your property. You can change this updated behavior for our plugin settings, for example, you can set it to "halt" in order to only send the update signal when the sliding gesture has been stopped.
Pro Tip
In order to fully benefit from these options, make sure that you are using a dedicated emitter-object.