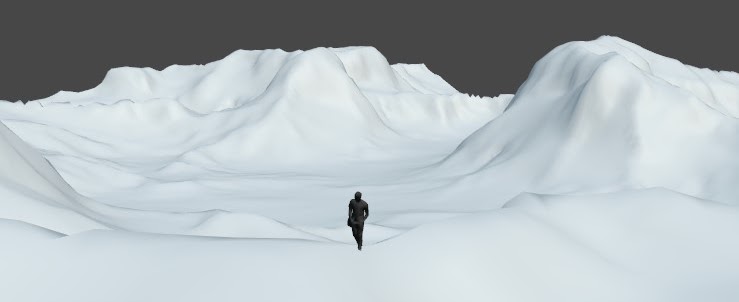
Emitter
Before scattering anything, you will need to define your emitter object.
What is an Emitter?
When using Geo-Scatter, the plugin will first ask you to define your emitter-object to be able to create or tweak a scatter. The emitter main purpose is to detain all the properties & settings of your scatter-system(s)
By default, every creation operator will use the emitter object as the scattering surface, however, the surface(s) can be picked independently from the emitter.
You can swap from one emitter to another from the header of your create or tweak panel. This process is not destructive, the settings will all be saved unless you delete one of these emitter object(s).
Switching Emitter's
In the plugin manager, there are alternative ways to switch from one emitter to another, for example, you can change the emitter with a pin/unpin action.
Note that the large lister interface (in the plugin manager) is also an efficient way to change between existing emitters quickly.
Reminder
The plugin manager is the place where your biome library is located, you can find it in Blender preferences, search "Geo-Scatter" and click on the "Enter Manager" button.
Surfaces
Pick your scatter-surfaces independently from the emitter
Pick your Surface(s)
By default, any new scatter will use the chosen emitter as the distribution surface. Since Geo-Scatter 5.3 you are able to pick any surface(s) of your choice independently from the emitter object:
- For already created system(s), in the Tweak > Surface when setting a scatter-system active.
- For system(s) soon to be created, in the operator's popovers menu located next to each large scatter button in the Create panel.
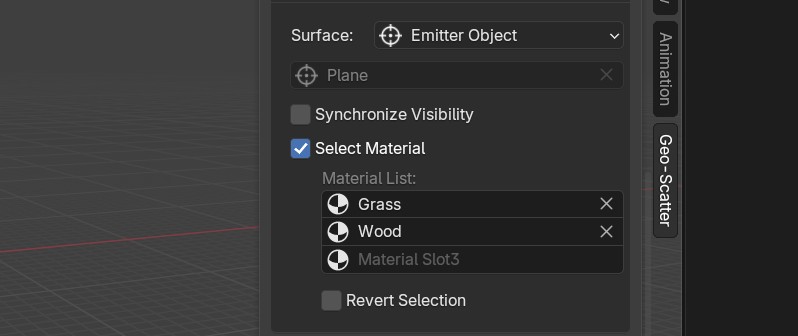
Pick your Material(s)
A blender object can have their faces assigned to different material ID's. With this feature, you are able to pick a specific material ID face's to scatter upon. The areas unassigned to the chosen materials will be culled effectively, before the distribution algorithm even starts. (Please note that this feature was implemented since Geo-Scatter 5.6, prior, material culling was located in the culling masks category)
Large & Highpoly Surfaces
Be careful when scattering on enormously large terrains, the scattering density is based on your surface's areas, and displaying too many instances will slow-down or sometimes freeze your computer. Some features such as abiotic curvature or vertex-group painting might be slow with heavy-polycount surfaces.
Pro Tip
If you intend to scatter on a large area, we advise you to read the optimization page. Note that thanks to the on-creation menu (located next to each large scatter operator button in the create panel) you'll be able to define default optimization settings of your scatters.
Non-linear workflow
The native scattering experience in Blender consists of adding a
particle-system data-block on a single emitter object that will be used as a scatter-surface as well, then repeat the
process on other objects when needed. While this workflow makes a lot of sense when working
with individual objects, from the point of view of scenery creation, this process is unnecessarily slow & repetitive.
This linear workflow is still available in Geo-Scatter, as your emitter will by the default surface of your scatters.
However now with our multi-surface functionality, the emitter object doesn't necessarily represent the surface you are scattering upon!
If you know in advance that you are going to work with many surfaces, it will make more sense to create a dummy object whose only
purpose is to be used as an emitter to hold the scatter-system(s) settings, then select your surfaces independently. You can create such a dummy object in the initial 'define-emitter panel', when no emitter is selected.
About Multi-surface Implementation
This multi-surface workflow has been rigorously implemented in our scattering pipeline, here are a few implementation examples:
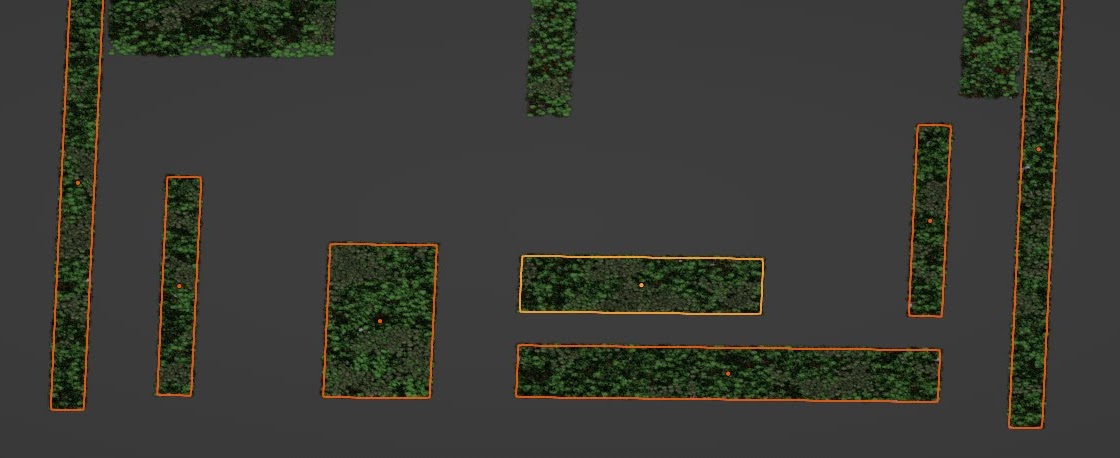
- It is possible to scatter locally on many surfaces simultaneously. Meaning that the distribution density will stay stable according to their transforms scale.
- All procedural features will still work as expected, individually per surface local space, or evaluated on your scene global space.
- Some inputs will be highlighted in red if an attribute (vertex group/ vertex color/uv layer) is not shared across all of your surfaces.
- The creation operators now have a "future surfaces" option in their creation popovers. where you can choose the default surfaces of your scatters.
- Manual distribution mode also accepts many surfaces as one large painting canvas. The scattered points will stick to each parent-surface automatically, adapting from their transforms. Swapping surfaces won't remove the created points.
Surface Auto-Hide
By default hiding a surface will not hide the scatters attached to that surface. If you wish the scatters to be hidden alongside the surface, enable the "Synchronize Visibility" toggle in the Tweak > Surface(s) panel.
Add New
The simplest way to add a new scatter-system
Add Operator
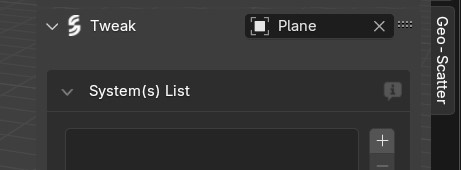
The fastest and simplest way to create a new scatter-system is by clicking on the add icon next to your system list, in the Tweak panel. This operator will create a simple random distribution on the defined emitter with a density of 0.2 instances/m² with no features enabled. If you have objects selected in your viewport it will link them in the instance collection, if not, it will activate the display-as feature by default.
Remove Scatters
If you wish to remove a scatter you created, please use the remove operator (button with the minus icon) to delete a scatter-systems, do not delete a Geo-Scatter collection or a 'scatter_obj' directly from the outliner, please use this operator instead.
Pro Tip
Hold the ALT key to consider the selection as your future surface(s) with undefined instances instead.
About Scatter Objects
When you create a scatter in our plugin, we will add a new 'scatter_obj' 3Dobject in your outliner with a geometry-node modifier attached. This modifier holds our 'GEO-SCATTER ENGINE' and is responsible for the scattering computing.
Density Scatter
2nd simplest way to do a scattering
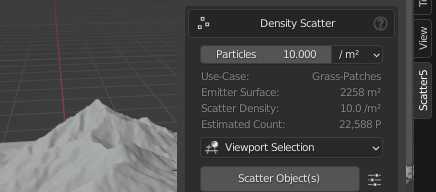
Density Scatter Operator
The second fastest way to scatter the selected objects from the 3Dviewport or from the selected assets from your asset-browser editor is by using the density scatter operator. Quite straightforward, choose your Particles /m², cm², ha, or km² ratio, an estimation will be made in real-time, then click on the scatter button.
A new scatter system will appear in your system list. Note that all system(s) created will always use the m² unit. The m is the internal unit of blender, it is best to stick with it.
Magic Wand
If you ever see a magic wand button in the density section of your distribution, it means that Geo-Scatter will automatically pick the ideal density depending on the average widths of the objects you are scattering! This little option will save you a lot of time finding the right density value for your objects, most of the time the density will be set automatically and will fit just right!
Preset Scatter
An easy-to-use 3-click process
How to use
One of the most important workflows of the Geo-Scatter plugin is the
"Scatter the selected Object(s) with the selected Preset" concept.
Follow these simple steps:
- Select your future instance(s) in the viewport (or in the asset-browser if you select the option).
- Select your preset by clicking on the thumbnail
- Click on 'Scatter', and it will scatter the selection on your emitter surface by default (you can define the default surface on the popover menu next to the scatter button).
Asset Browser
Since the arrival of the new asset browser in Blender 3.0 we wanted to be the first to harness its full power within our plugin! Within the tweak panel interface, you'll be able to define if your scatter operator will scatter the selected objects of the viewport, or the selected assets in your asset-browser. If you choose this latest option, Geo-Scatter will automatically import the assets then proceed to scatter them.
Install the Presets
These colorful presets are parts of the preset.scatpack, shipped with our Geo-Scatter plugin. You'll be able to install this preset scatpack just like you would install a biome scatpack.
Pro Tip
- Note that you can generate a preset icon in the settings menu, by clicking on the wheel-gear icon.
- Note that these presets can be applied directly to the selected-system(s) in the drop down menu of the lister interface, or on the per settings category menu by clicking on the gear-wheel icon in your settings header of the Tweak panel menu.
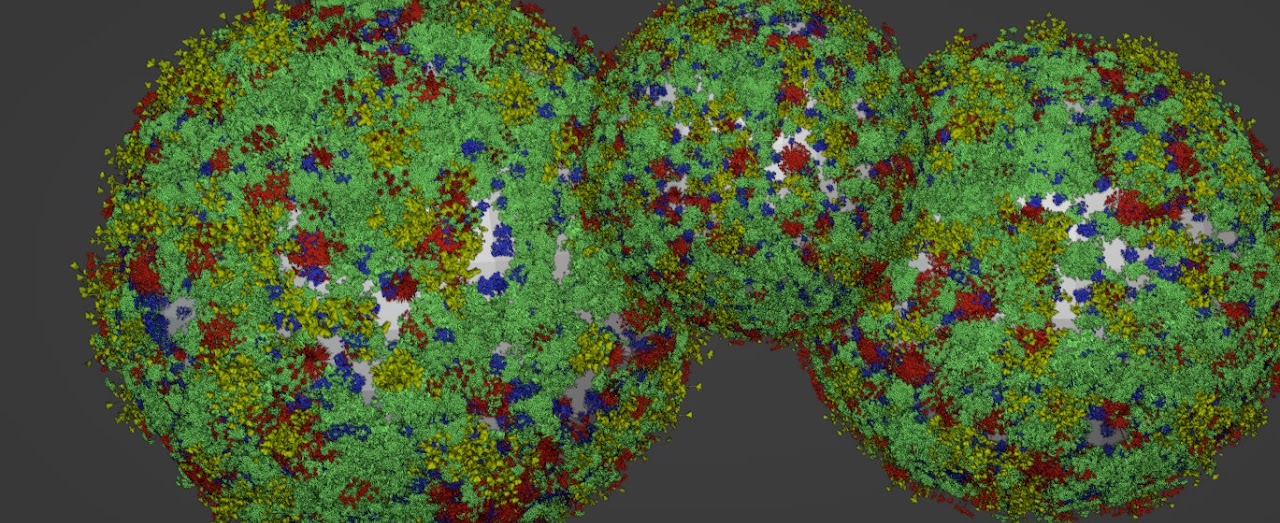
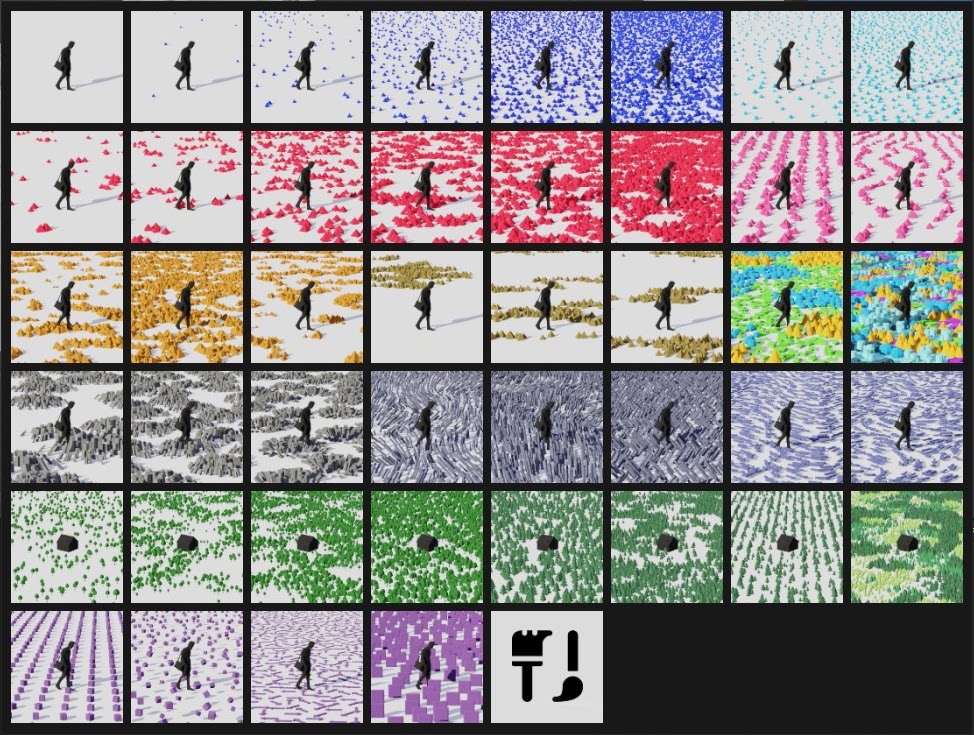
The Presets
A preset is a .preset json file encoded with scatter settings. Presets are completely customizable, you can create your own presets, save them, and share them with your friends or collaborators.
Color-Code
-
Dark Blue: Simple Random Distribution
-
Clear Blue: Random Distribution with limit collision enabled
-
Red: Random Distribution with unique noise patterns.
-
Pink: Same as above, but with wave patterns.
-
Orange: Random Distribution with multi-user patterns via RGB channels.
-
Brown: Random Distribution with multi-user patterns via color ID.
-
MultiColor: Random Distribution with 'Cluster' instancing pick method.
-
Grey: Clump Distribution
-
Greyish Blue: Random Distribution with a rotation tilt feature enabled.
-
Desaturated Blue: Random Distribution with a generative flowmap influencing instances tangent direction.
-
Greens: Forest Presets
-
Camo: Forest Presets with 'Cluster' instancing pick method.
-
Purple: Special examples, such as per face, offset, 45d snap, or billboards.
Biome Scatter
Only one click and all the work is done for you
How to use
When we first invented the biome system for Blender back in 2019 we knew that it would quickly become an all-time fan favorite!
Our biome system grants you the ability to append a whole pre-made
multi-layered ecosystem with only one click! All assets your biome is using will first be
linked or appended to your file, then the scattering will be done automatically, layer by layer, in front of your eyes.
Access Interface
You can access your biome library by clicking on the 'Open Biome' button in the Create panel. Note that this interface is also accessible from Blender addon preferences editor, search for the Geo-Scatter plugin and click on the 'Enter Manager' button.
Install Biomes
Installing a biome pack is easy. In the biome interface, click on Header > File > Install a Package button. Choose your .scaptack file, then you'll also probably need to install assets in your blender asset-browser. Please check out the Installation page for more detailed information about the process.
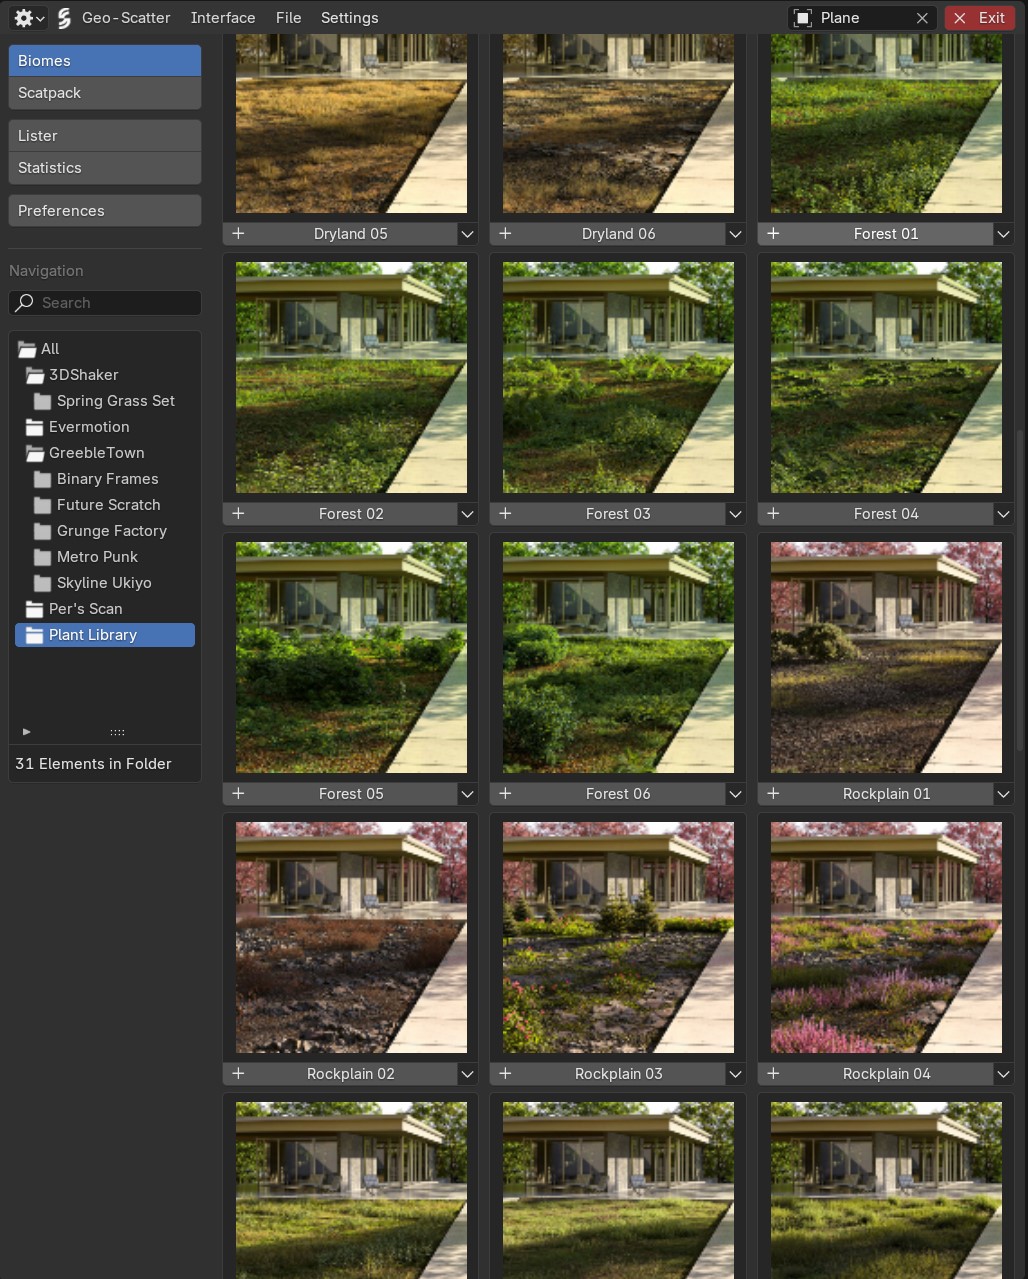
Biome Library
The biome-system we invented, available for the Geo-Scatter or Biome-Reader plugin, is fantastic and extremely effective! And here's the good news, you can get a library of plants and biomes absolutely for free, it's called the Plant Library, The free biomes vary from classic grasses to autumn, winter, desert, or flowers.. We got you covered with a variety of natural moods, great to start your scattering journey.
Be aware that assets are not our focus! We want to work with talented asset-creators, not compete with them! Do not expect free updates with new models for the plant library coming in the near future, we'd much rather want to motivate you to create your own biome library and share it with the community, or use the biomes of the community directly of course. (you can check out all asset-packs that also propose biomes on this page ).
Create your own Biomes!
Creating new biomes can be done with very few clicks. To do so, go in the biome manager, in Header > File, click on Create a new biome, then follow the instructions, and you'll be good to go (if you need more clarifications about the biome creation dialog settings, hover on a setting to read it's description). Biomes icons can also be generated on the fly with the operator located on the drop-down menu next to their add button.
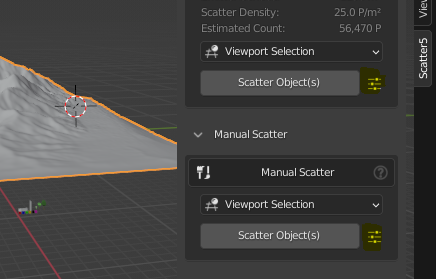
Manual Scatter
Directly enter in manual mode
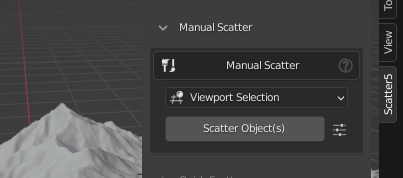
Manual Scatter Operator
Manual mode is a distribution workflow of its own, existing in its own custom interface, similar to sculpt mode. In this mode, you will be able to paint scatters like an artist on a canvas with the help of brushes. With its operator located in the Create panel, you can directly enter this mode with the selected object(s) from your viewport or asset browser as instances. More about manual mode on this page.
Quick Scatter
Scatter faster than ever with pie and shortcuts
Quick Scatter Operator
In Geo-Scatter 5.1 we added a new shortcut based workflow where you''ll be able to create and directly tweak scatter-system(s) faster than ever with the help of a pie meny and shortcuts.
-
The default shortcut to call the operator is SHIFT+CTRL+ALT+W however it's best if you assign a shortcut of your preference in the operator popover 'on creation' menu located next to the operator large button.
-
If you call the shortcut within the asset-browser editor area, it will use your selected assets as instances. If you call the shortcut on a 3Dviewport, it will use the selected objects of your viewport as instances.
-
The default density of this operator can be tweaked in the popover 'on creation' menu.
-
This operator is non-destructive, when using the tweaking shortcuts, it will interact with Geo-Scatter distribution density/ culling masks/default scale/and the first pattern slot.
Operator Popover
Also called the 'On Creation' menu. Control how the scatter operators behave!
Operators Settings
The default behaviors of the operators located in the Create panel can be tweaked in the 'On Creation' popover menu,
by clicking on the settings icon next to the operators large buttons.
Here's what you can do from this menu
-
By default all these creation operators will use the emitter object as the surface, however you are free to use another surface(s) independently from the emitter object chosen.
-
If you know in advance that you will generate a lof of instances, the future 'Visibility' and 'Display' settings can activate optimization features by default.
-
Use the future mask settings if you'd like to directly paint or assign a mask(s).
-
You can choose to import or link the models from the biomes or asset browser.
-
These operators may do security checks when you try to scatter too many instances or too high-poly instances. You are able to adjust the security parameters in this menu as well.
List Interfaces
The interface where you will define the active and selected system(s)
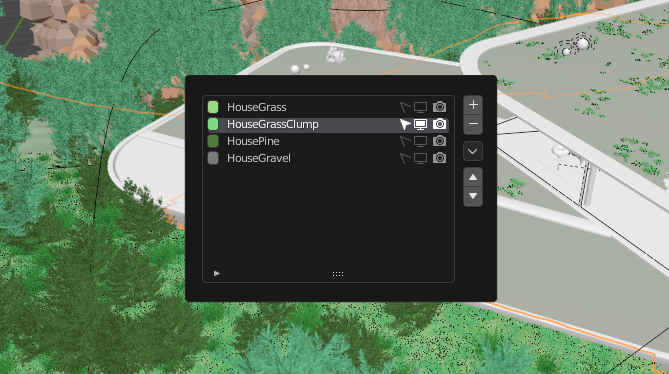
Main Lister
The main system list interface is located in the Tweak panel. This is where you will define the active scatter or group system to tweak its settings. The selection is mainly used for batch operations and by various operators.
Shortcuts
- Press ALT while clicking on the remove icon to batch remove the selection.
- Press ALT while clicking on a system to isolate the selection (it will hide the non selected systems).
- Press SHIFT while clicking on a system to add to the selection.
- Press SHIFT+A while clicking on a system to select all systems between the new click and the previous click.
- Press ALT+SHIFT while clicking on a system to isolate the selection.
- DOUBLE-CLICK on a system to rename.
Functionalities
In this interface, you'll have access to several operators:
- Click on the plus icon to add new scatter systems.
- Click on the minus icon to remove selected systems.
- Click on the down arrow menu icon to open the drop-down menu where you'll find many other useful operators. Hover over them to read their descriptions.
- Click on the up/down arrow icons to reorder systems in the list.
Lister Shortcut
Use the CTRL+SHIFT+Q shortcut to call a quick lister interface. It's best practice to avoid constantly going up & down in the tweaking interface and use this operator instead! Note that you are able to customize this shortcut in the plugin manager.
Shortcuts
- Press SUPPR to remove the system.
- Press CTR+G / ALT+G to group/ungroup system.
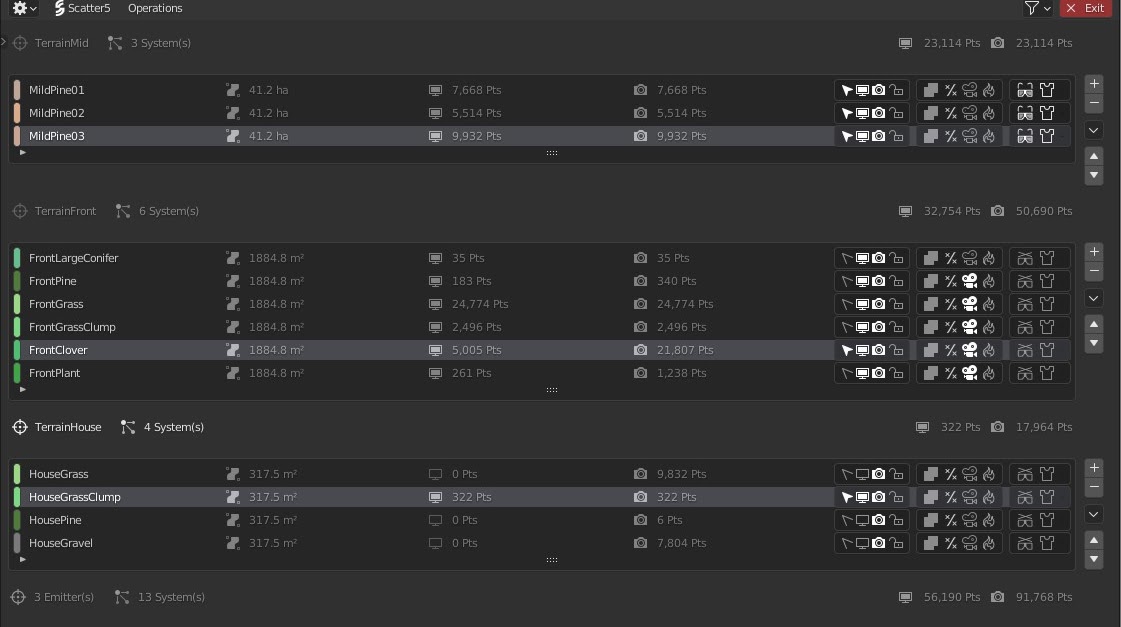
Large Lister
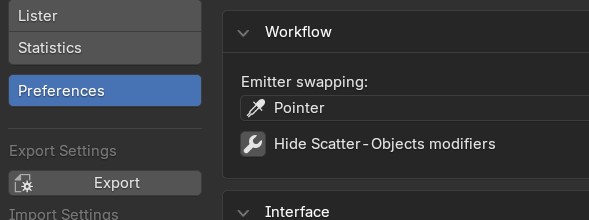
In the plugin preference, a large lister interface is available as well as a dedicated statistic interface. This interface will regroup all the scatter-system(s) and emitters existing in your scene. You'll find handy operators available to batch change scatter-systems(s) settings properties.
Scatter Groups
Organize scatter-layers together!
Scatter Groups
Scatter-groups are ways to group single scatter-system layer together. It's great for organizing your environments, but also great for creating scatter compositions as you'll be able to use "group features": When a group is selected on the lister, you yan for example mask all members of that group with one vertex painting brush stroke for example!
Where?
You can add or remove scatter-groups in the drop-down menu, located next to your scatter lister interface. We made entire videos about groups on our youtube channel, check it out! (Pleasde note that the grouping operators slightly changed since we released Geo-Scatter 5.6, but the principle stays the same).
Nested Groups
Since Geo-Scatter v5.6, scatter groups can now be nested up to 4 levels deep. You'll find new scatter & group grouping operators in the system lister right drop-down menu. This nested grouping system creates a layer-based workflow similar to Photoshop or Substance Painter, where group masks are applied cumulatively through the hierarchy, making it very powerful for creating complex scatter compositions. The grouping operators located in the system lister right drop-down menu offer flavors of operations:
- For Selected Scatters: Assign them to existing groups or create new groups for them
- For Active Groups: Assign the active group to another group or create a new parent group for it
- Ungroup/Unnest: Remove scatter-systems from groups or remove groups from their parent hierarchy
Category Menu
Click on the gear icon to access the popover category settings
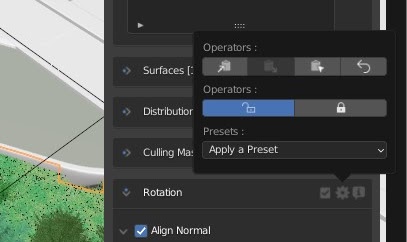
Category Menu
In Geo-Scatter, every setting of your scatter-system(s) are organized per category, each category has its own header menu (gear icon) where you are able to:
- Copy/Paste settings.
- Reset settings to default values.
- Apply the settings to other scatters.
- Apply a preset to your settings.
- Lock/Unlock the settings.
Pro Tip
The gear icon will contextually change to a 'lock' icon if the settings are locked, or to a 'sync' icon if these settings are synchronized.
Reminder
Perhaps you'd like to copy/paste an entire system?
This
feature is available in the lister interface drop-down menu.