Introduction
Introduction to physics distribution mode

The Idea of Physics Mode
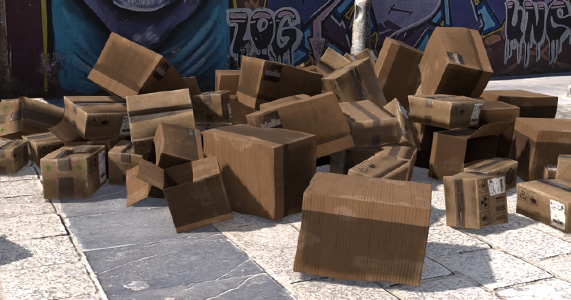
Physics Mode is similar to Manual Mode but greatly enhanced with rigid body simulation thanks to bullet physics engine. The result? A workspace/playground where instances become physical objects that interact with forces, collisions, and gravity.
Since Physics Mode shares the same brush-based workflow as Manual Mode, most of the knowledge and techniques from Manual Mode still apply here.
Placing Instances
Like Manual Mode, points are manually encoded within a mesh. In Physics Mode, instances settle through rigid body simulation, then get encoded as distribution points.
Unlike Manual Mode where rotation can be adjusted later, Physics Mode requires a fixed transform matrix, position, rotation, and scale are locked to match physics collision results.
Just like Manual Mode
Physics Mode shares the same brush-based workflow as Manual Mode:
- Active tool options in the 3D viewport header use popup menus for rotation, scale, and stroke behavior (brush radius, point density, pressure sensitivity, etc.).
- Each brush has gesture gizmos with visual feedback, press F to adjust radius, for example.
- Gesture shortcuts are displayed in the lower-left corner; keyboard shortcuts are customizable in addon preferences, just like Manual Mode.
- Use RMB to open a context menu with additional options.
Getting Started
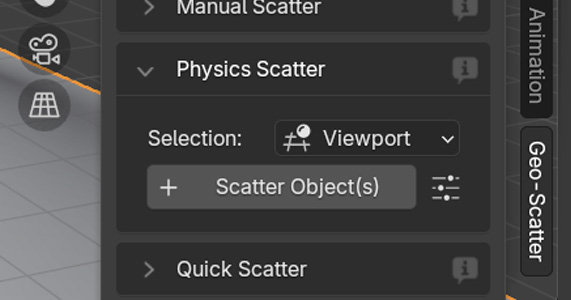
In Tweak > Geo-Scatter > Create, you can start physics simulation mode directly with the selected viewport scatter.
Click the option button right next to the scatter operator to change on-creation options, such as the default simulation static surface.
Pro Tip
Try to use real-world dimensions by applying Blender scale transforms before entering Physics Mode. (In Blender, Use CTRL+A menu to apply an object scale).
State Colors
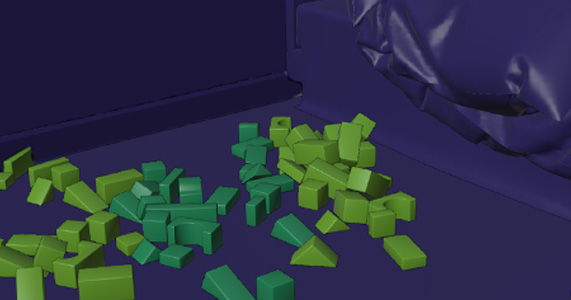
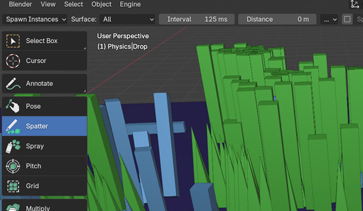
Physics Mode uses color coding to help you visually distinguish between different object states in the simulation.
Dark Blue: Static objects used for collision. These objects don't move and serve as collision surfaces for dynamic instances.
Green: Dynamic objects that are actively simulated. These instances respond to physics forces, collisions, and gravity.
Dark Green: Frozen objects that are harder to move. These instances remain part of the simulation but have increased resistance to forces.
Advanced Settings
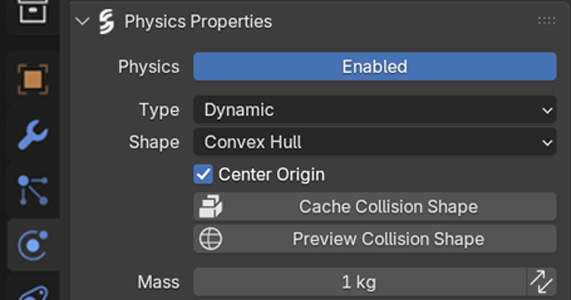
More options are available in Properties panel > Per Object Physics Properties > Geo-Scatter Physics to define options such as surface response & collision shapes.
Generic simulation world & engine rules in Properties > Scene > Geo-Scatter Physics Simulation.
It is also possible to launch physics simulation standalone from there, without
going through the classic 3D viewport Geo-Scatter N-panel interface.
Distribution Brushes
Brushes that add new instances
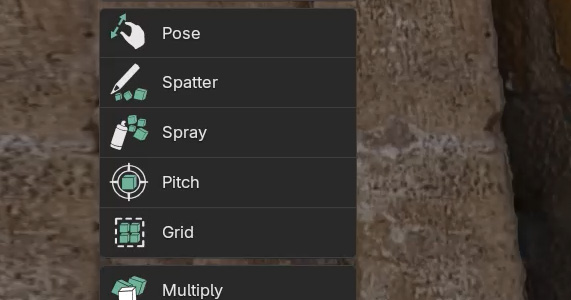
Pose Brush
Click to add a new instance, then drag to adjust scale and rotation alignment. The distance from the initial click point determines the scale, while the drag direction sets the rotation. Once the mouse is released, the simulation will kick in and the instance will settle according to physics.
Spatter Brush
Continuously creates new instances under the mouse cursor while the mouse button is held. Each instance is immediately added to the simulation as it's created, allowing for dynamic, real-time physics interaction. This brush is ideal for quickly populating an area with instances that will interact with each other through collisions.
Spray Brush
Add new instances in batch under the spray radius area. This brush distributes multiple instances simultaneously within the defined radius, creating a dense cluster that will immediately interact through physics simulation. Useful for quickly filling areas with instances that will settle and collide naturally.
Pitch Brush
Throw instances like a cannon, shooting them in a viewport-aligned direction. Each click launches instances with velocity, creating dynamic motion as they fly through the scene and collide with surfaces and other instances. Perfect for creating scattered, natural-looking distributions through physics.
Grid Brush
Add new instances in a 2D or 3D array pattern. This brush creates organized, evenly-spaced grids of instances that can be arranged on surfaces or in 3D space. Once placed, all instances enter the simulation simultaneously, allowing them to settle and interact according to physics rules.
Multiply Brush
Duplicate existing instances and directly kick them into the simulation. This brush allows you to select instances and create copies that immediately enter the physics simulation. Useful for quickly expanding distributions while maintaining the characteristics of existing instances.
Place Brush
Similar to Pose Brush, but allows you to move your instance around before releasing the mouse button. Click to create an instance, then drag to reposition it in 3D space. The simulation freezes during movement. Once released, the instance enters the simulation from its final position.
Translation Brushes
Brushes that change the location of instances
Tweak Brush
Move a single selected object around interactively while the simulation is still running. This brush allows for precise, real-time positioning of individual instances within the active physics simulation.
Sculpt Brush
Similar to the Free Move Brush, it lets you freely move instances within the brush radius while the simulation is running. Instances can be repositioned in 3D space and will continue to interact with the physics simulation in real-time.
Plough Brush
Similar to the Push Brush, it lets you push instances around on a plane in the brush direction while the simulation is running. Instances are moved along the surface plane according to your stroke direction, maintaining real-time physics interaction.
Heap Brush
Attracts instances to the brush location, like a gravity field. Instances within the brush radius are pulled toward the cursor position, creating natural accumulation effects while the simulation continues to run.
Attract/Repulse Brush
Similar to Heap Brush but with easy repulsion using the CTRL shortcut and a different algorithm. Hold CTRL while clicking to repulse instances away from the brush location, or use normally to attract them. The simulation runs continuously during interaction.
Explode Brush
Generates a strong repulsion radius that starts as soon as the LMB is released. Instances within the brush area are forcefully pushed away from the center point, creating explosive scattering effects in the physics simulation.
Earthquake Brush
Vibrates the static surfaces to shake the dynamic instances positions. This brush affects collision surfaces, causing them to oscillate and creating realistic earthquake-like effects that disturb all dynamic instances in contact with those surfaces.
State Brushes
Change the states of your simulated instances
Erase Brush
Classic eraser brush to remove instances located within the brush radius. Instances will be deleted from the simulation when brushed over.
Freeze Brush
Makes instances harder to move, but they still remain part of the simulation. This brush increases the resistance and stability of instances, making them less responsive to forces while still participating in physics interactions.
Convert Brush
Lets you swap instances from a dynamic simulated state to a static shape that is strictly used as a collision shape. Converted instances don't move and are no longer dynamic, but they still provide collision geometry for other dynamic instances in the simulation.
Native Blender Tools
Use blender native tools to toy with the simulation
Selection Brushes
Users can use the select box tool and other Blender native selection tools to select instances in Physics Mode. Standard Blender selection methods work seamlessly with physics mode instances, allowing for flexible selection workflows.
Pro Tip
Many brushes rely on selection or brush radius to determine which instances they affect. Understanding how selection works will help you use brushes more effectively.
Blender G/R/S
Users can use classic Grab/Rotate/Scale shortcuts (G, R, S) in real-time and play with these native shortcuts in the simulations. Transform operations work directly on selected instances while the physics simulation continues to run, providing immediate visual feedback.
Copy/Paste
Native Blender copy/paste and duplication shortcuts work with Physics Mode instances. Use CTRL+C to copy and CTRL+V to paste selected instances, or use SHIFT+D or ALT+D to duplicate selected instances. Copied or duplicated instances immediately enter the physics simulation and can be manipulated in real-time.
Deletion
Standard Blender deletion shortcuts work seamlessly with Physics Mode instances. Use X to remove selected instances from the simulation. Deleted instances are immediately removed from both the physics simulation and the distribution.
Header Options
The header of manual mode has a few handy options!
Header Options
There are important options available in the physics mode header:
-
Regular Blender Elements Physics mode lets you fully access regular Blender interface elements and menus such as the View/Select menu, or Render & Overlay panels.
-
Engine Menu: In this menu you'll have access to advanced physics engine settings, such as pausing the physics simulation, cancelling it, or enabling the viewport dynamic/static/frozen overlay colors on your objects.
-
Tools Options: When picking an active brush, their options will be available in the header, via various popup menus, or important properties displayed directly.
Instancing Controls
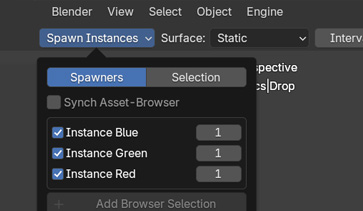
Just like manual mode, physics mode lets you have full control over which instances are spawned when painting.
-
Enabling Toggle Enable or prevent the instance from being spawned when painting.
-
Probability Rate Decide the probability of an instance being spawned when painting, the higher the probability the more likely the instance will be spawned.
-
Sync AssetBrowser Synchronize the selected assets from your Blender asset browser as instances in your instancing list. Everything will be imported and enabled automatically. This option makes for a highly efficient workflow when you're working with a lot of assets.
Convert Operation
Convert back and forth between different distribution modes
Convert Operation
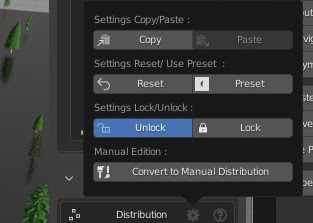
In the distribution header menu (gearwheel icon), you'll find operators to convert a regular procedural scatter to physics or manual mode.
This operation is semi-destructive, as it will turn off most procedural features ( Physics mode doesn't benefit from procedural features ).
Please note that physics mode can simulate smoothly up to 5,000 rigid bodies simulations. Therefore avoid
converting large procedural scatters to physics mode, as it will likely hard freeze Blender doing so.
Physics and Procedural
Physics distributions are still compatible with regular procedural features
Physics & Procedural Effects
Procedural features are still compatible with physics mode, they still can be enabled and used. However, instancing methods will be exclusive to Physics Indexing and using most procedural features might cause incoherencies between the computed physics transforms and the procedural effect. If you for example add a rotation procedural effect to your physics placed instances, the new rotation might not accurately represent the collision computed in physics mode. This is why we recommend disabling most procedural features for a collision accurate experience!